A successful test patch tells you more than soaking an entire room. Some wallpaper comes away dry; some separates into a top layer and backing; washable finishes may resist moisture. The wall underneath matters too: damaged drywall paper needs a gentler approach than sound plaster.
Test a small seam first, remove what peels dry, then soften remaining backing and paste without saturating the wall.
Go straight to the stepsBefore you begin
Protect electrical fittings and isolate the affected circuit before wet work nearby. Do not soak electrical boxes or drywall. Assess old coatings for lead and other hazards before disturbing them.
What you’ll need
- Drop cloths and towels
- Wide wallpaper scraper or putty knife
- Sponge and bucket
- Wallpaper remover if required
- Optional scoring tool for appropriate paper
Let’s do this
Step by step
- 01
Prepare and test a low corner
Clear the room edges and protect the floor. Lift a seam carefully with a scraper held at a shallow angle. Pull a small section slowly back along the wall to see whether it releases whole, in layers or barely at all.
- 02
Strip removable facing first
If the paper is designed to strip dry, continue gently. If only its facing peels, remove that facing before treating the backing. Work in strips you can control instead of pulling hard enough to bring the wall surface with it.
- 03
Soften a small remaining section
Use a wallpaper-removal product according to its label, including any dilution and waiting time. Score only if needed for that covering and with light pressure. Keep moisture localized; paper facing on drywall can soften along with the wallpaper.
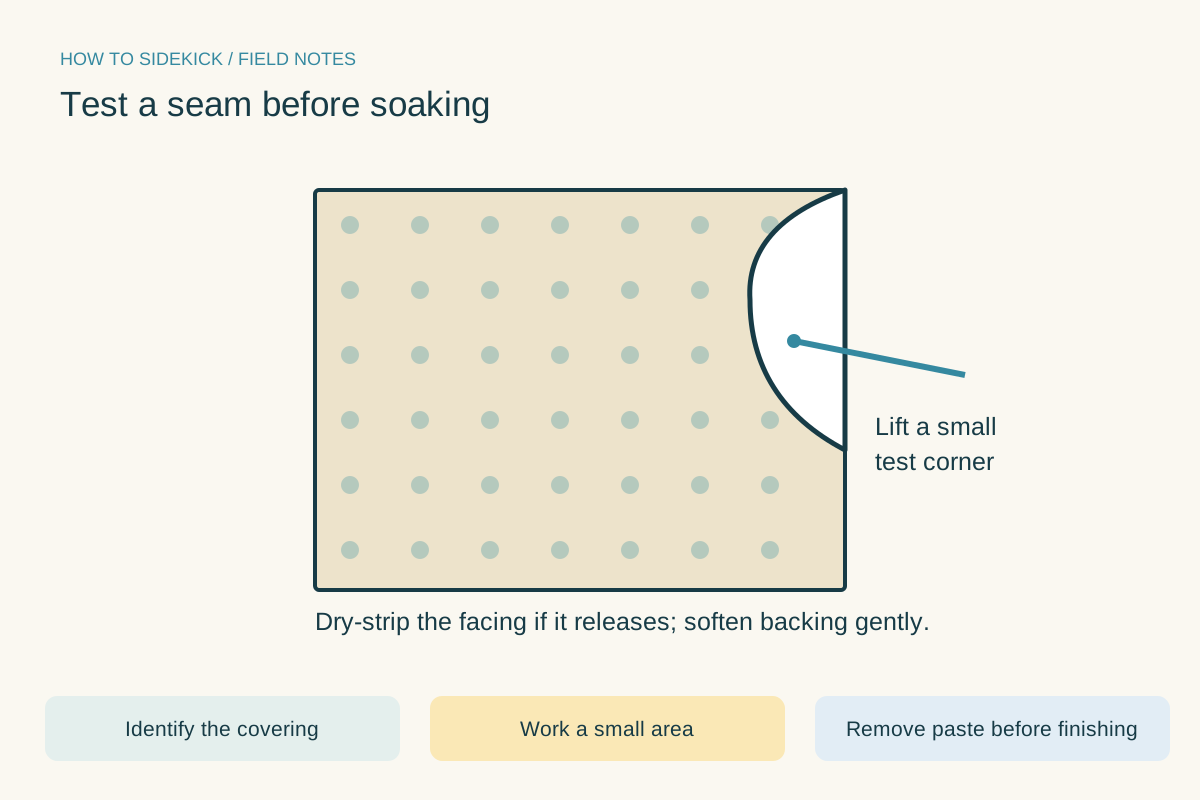
Test a seam before soaking. Use the instructions below for the full procedure.Open full-size image - 04
Scrape while the adhesive is softened
Use the broad blade nearly flat against the wall and let softened material release. If it resists, reassess the wetting and dwell time. Do not dig the blade into the board. Keep scraps out of the wet working area.
- 05
Clean paste and allow drying
Remove leftover paste with the recommended cleaning method, changing dirty water as needed. Let the wall dry fully before judging repairs. Repair damaged areas and use a suitable primer before new wallpaper or paint; residue left behind can spoil the finish.
Should you use a steamer?
A steamer can help with difficult paper but adds burn and moisture risks. Follow its operating directions, keep the steam plate away from skin and electrical fittings, and test the wall first. It is not a reason to saturate already damaged drywall.
A quick final check
- Small area tested
- Floor and electrical areas protected
- Backing and paste removed
- Wall dry before repairs
Common questions & sticking points
Can I paint straight over the leftover glue?
Remove adhesive as thoroughly as the wall and product instructions require, then use the appropriate preparation and primer. Paint over residue can develop an uneven or failed finish.
Why is the drywall paper coming off too?
The wall may have been poorly primed, already damaged or over-wetted. Stop aggressive scraping, let it dry and reassess the repair before continuing.
Sources & further reading Optional
References used to check this guide. Follow your product’s own safety instructions where its design differs.
- Lowe’s: wallpaper types and removal methods
- ROMAN: wallpaper removal kit and instructions
- ROMAN: removal concentrate label