Good support matters as much as a straight pencil line. If the cut pieces close onto the blade, it can bind and kick back. This introduction is for a straight cut in ordinary wood, within the saw’s capacity, with a stable setup you can control.
Secure the work so the kerf stays open, set the saw with power isolated and make a steady cut with both hands on the intended handles.
Go straight to the stepsBefore you begin
Read the saw manual and get hands-on instruction if you are unfamiliar with it. Keep the lower guard working, isolate power for adjustments and keep hands out from underneath the work.
What you’ll need
- Circular saw, correct blade and manual
- Stable supports and clamps
- Straightedge or suitable cutting guide
- Tape measure and square
- Eye and hearing protection; appropriate dust control
Let’s do this
Step by step
- 01
Inspect and set the saw
With battery removed or power unplugged, check the blade, mounting and freely returning lower guard. Select the correct blade and depth according to the manual, with only the specified amount of tooth below the material. Lock all adjustments.
- 02
Mark the kept side and kerf
Draw the cut line with a square and mark the waste side. The blade removes a strip of material called the kerf. Make a scrap test to learn which side of the saw’s guide mark corresponds to your blade and the edge you want to keep.
- 03
Support and clamp the work
Keep the main piece stable and arrange the cutoff so it cannot pinch the blade as the cut finishes. Support large panels appropriately across their area. Keep clamps, cords and the support structure clear of the entire blade path.
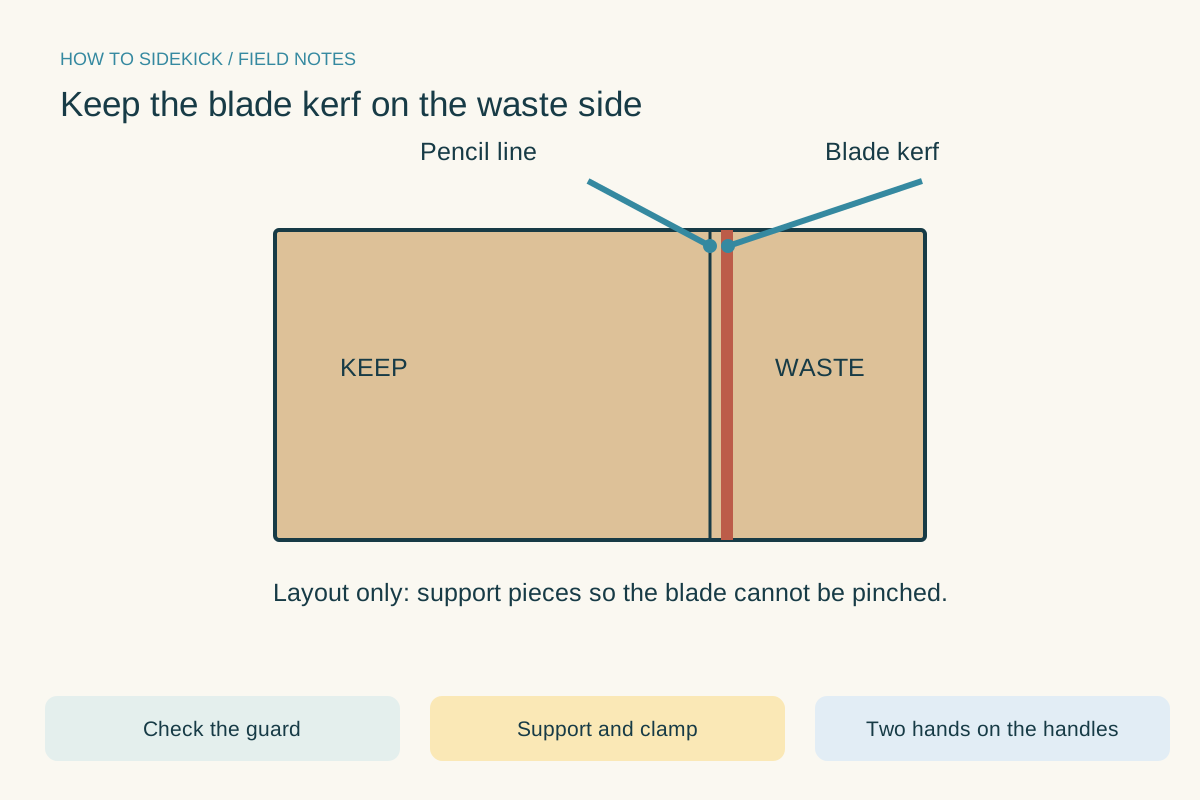
Keep the blade kerf on the waste side. Use the instructions below for the full procedure.Open full-size image - 04
Make the cut steadily
Restore power when ready. Hold the specified handles with both hands, stand out of the kickback path and begin with the blade clear of the wood. Let it reach speed, then follow the guide without forcing or twisting the saw.
- 05
Finish under control
Support the saw through the end of the cut. Release the trigger and wait for the blade to stop; confirm the guard covers it before setting the saw down. If the cut binds, stop and correct support or alignment rather than steering a running blade sideways.
Use a guide that fits the saw
A straightedge must account for the distance from the blade to the edge of the shoe. Test that offset on scrap and position clamps outside the motor and shoe path. A marked straightedge is not helpful if the saw cannot pass its clamps.
A quick final check
- Blade and guard checked
- Kerf on waste side
- Work cannot pinch blade
- Blade stopped before setting down
Common questions & sticking points
Can I hold the cutoff with my other hand?
Do not reach into or under the blade path. Use the required support arrangement and keep both hands on the saw’s intended handles.
Can I pin the guard open?
No. A sticking or obstructed guard needs correction before use. Do not defeat it to make a cut easier.
Sources & further reading Optional
References used to check this guide. Follow your product’s own safety instructions where its design differs.
Last source check: September 24, 2026