A rectangular box is the easiest place to learn gift wrapping. Most messy corners come from too much paper at the ends or taping before the folds are aligned. Take a moment to test the paper size, then make each crease before reaching for the tape.
Cut enough paper to overlap around the box, fold and tape the long seam, then make triangular flaps at each end and fold them closed.
Go straight to the stepsBefore you begin
Secure the gift inside its box first. Keep scissors and loose packaging away from small children, and remove price stickers only where appropriate.
What you’ll need
- A rectangular gift box
- Wrapping paper
- Scissors and tape
- A gift label
Tools & supplies for this project
Affiliate disclosure: We may earn a commission when you buy through these Lowe’s links. How our links work.
Use what you already own. If you need supplies, compare these options with the requirements above and choose only the items your project needs.
Check Lowe’s for current price, availability and specifications.
Let’s do this
Step by step
- 01
Measure before cutting
Place the box on the reverse side of the paper. Bring the paper around it to check for a modest overlap. At the ends, leave enough to cover the box’s height without a large pile of excess.
- 02
Close the long seam
Center the box face-down. Bring one long paper edge over, then overlap the other. Fold the exposed cut edge under for a straight finish and tape the seam.
- 03
Shape one end
At an open end, press the paper inward along the box’s side edges. Crease the diagonal folds to form top and bottom flaps.
- 04
Fold the flaps closed
Fold one flap against the box, then fold the other over it. Tuck a rough edge under if useful and tape neatly.
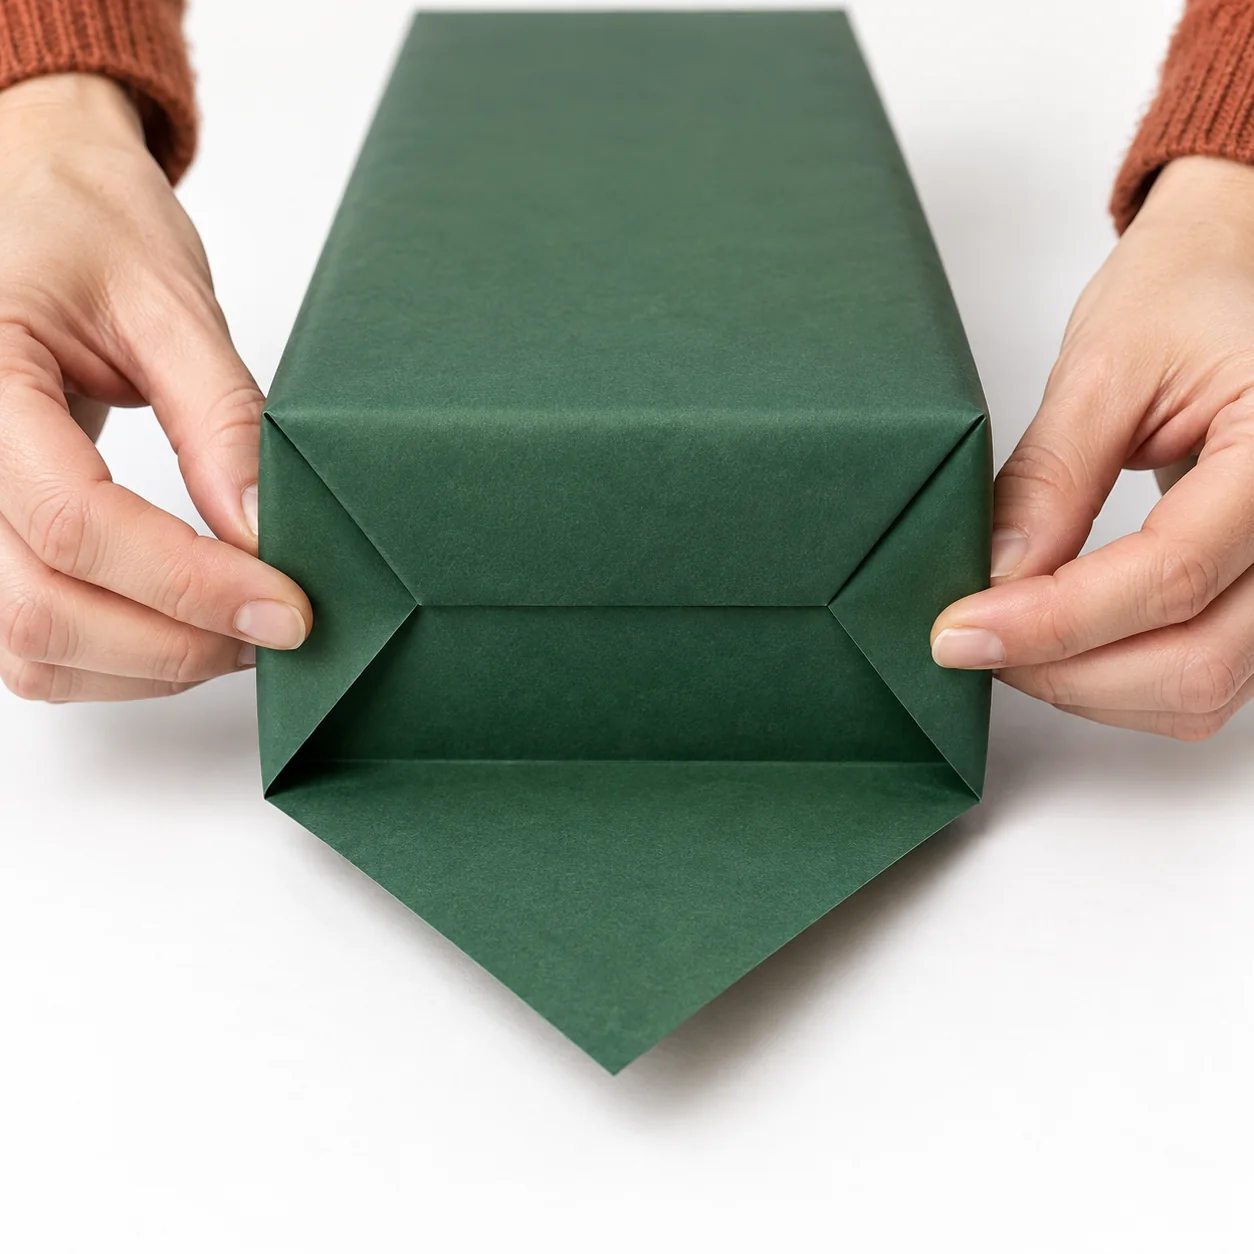
Crease the sides first. Fold the lower flap over the upper one and secure the overlapping paper.Open full-size image - 05
Repeat and label
Finish the second end, turn the box over, and add the recipient’s label. A ribbon or bow is optional.
Optional supplies on Amazon
Affiliate disclosure: As an Amazon Associate I earn from qualifying purchases. How our links work.
Use what you already have. These links open Amazon search results so you can compare suitable supplies; they are not individual product reviews.
Fix the common problems locally
If an end is bulky, open that end and trim a little excess before refolding. You do not have to remove the whole sheet. If a cut edge is crooked, a small folded hem can make it look intentional.
If the paper tears at a corner, check whether it was pulled too tightly. For a small tear, a coordinated paper band or gift label may provide a tidy repair. For a large tear, use a fresh section rather than covering the entire box in tape.
Make the next gift easier
Keep tape within reach and prepare a few small pieces before holding a fold in place. Clear enough table space to rotate the box; trying to work around it without turning it often makes one end much harder than the other.
For an irregular object, put it in a suitable box or use a gift bag. A different package shape is a practical choice, not a failure to master the rectangular-box method.
A quick final check
- The box is covered without exposed contents.
- End folds lie reasonably flat.
- The gift has the correct recipient label.
Common questions & sticking points
How much paper should I leave at the ends?
Enough for the flaps to cover the end with a small overlap. Test the fold before cutting; excessive paper creates bulky corners.
Do I need expensive wrapping supplies?
No. A box, paper, scissors, and tape are enough for this method. Neat sizing and creases make the main difference.
Sources & further reading Optional
References used to check this guide. Follow your product’s own safety instructions where its design differs.
Last source check: September 21, 2026