This repair reconnects sound fabric edges where stitching has failed. Fabric torn away needs a different repair.
Bring the sound fabric edges back together along the old seam line. Work small backstitches through both layers, overlap the intact stitching at each end, and secure the thread.
Go straight to the stepsBefore you begin
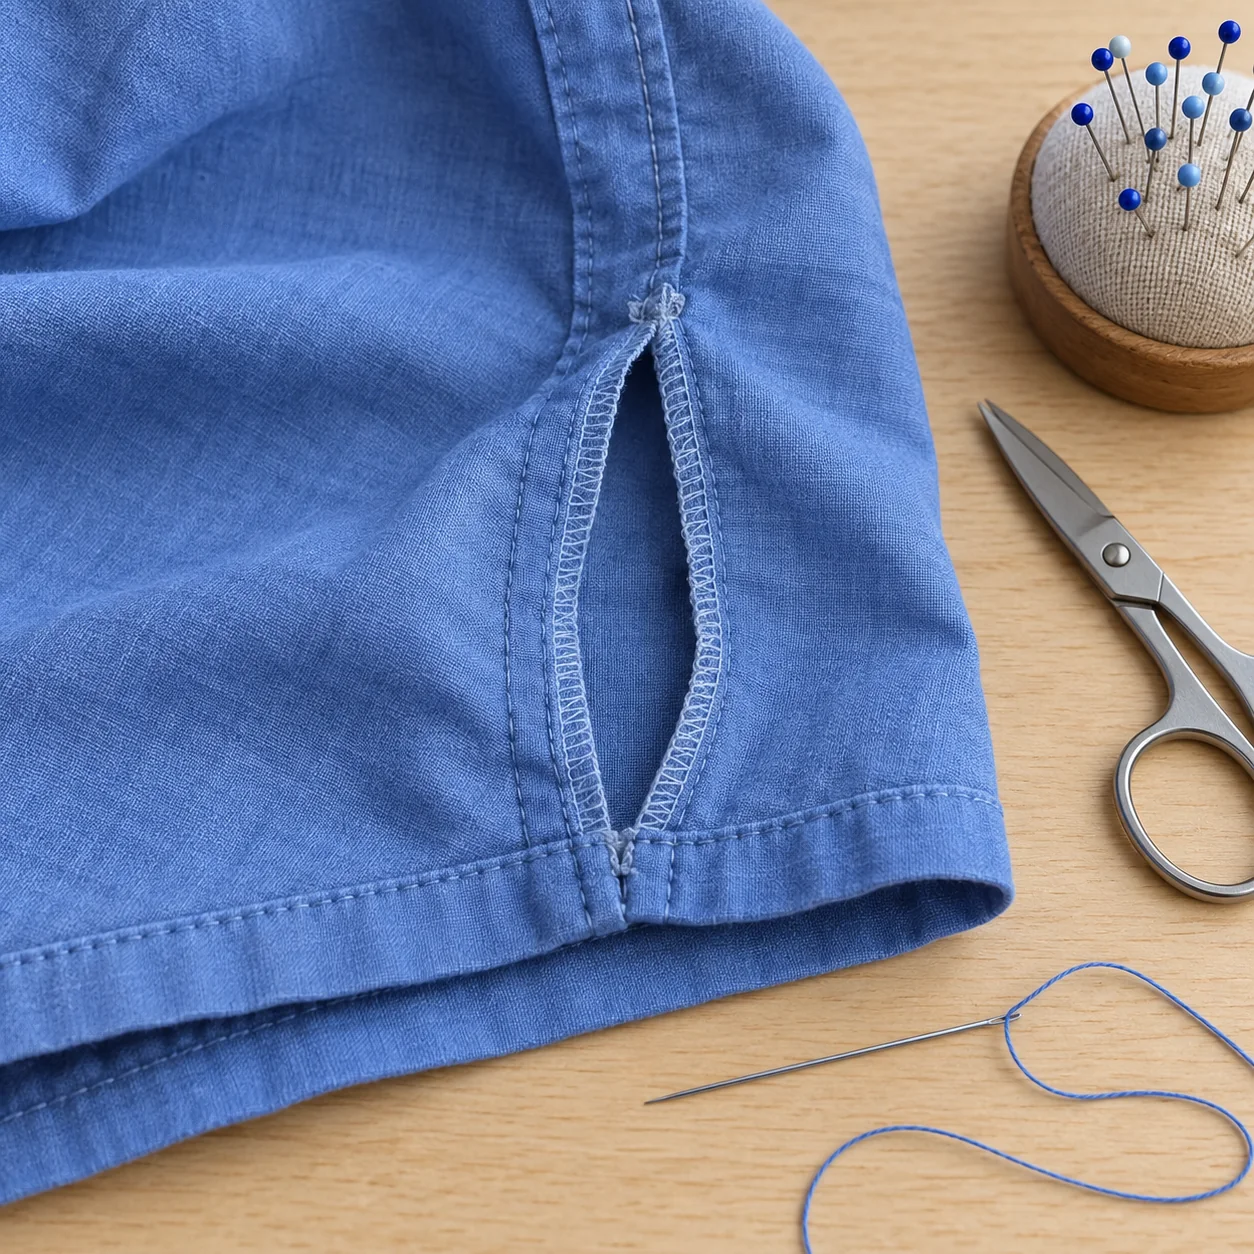
A short seam opening in ordinary woven fabric where the fabric and seam allowances remain sound.
What you’ll need
- A fine hand-sewing needle
- Matching sewing thread
- Small scissors, pins and a ruler
- A needle threader if useful
Let’s do this
Step by step
- 01
Check why the seam opened
Turn the garment inside out. Check the gap and surrounding fabric. If the garment is too tight, sewing the opening shut leaves the same strain on the seam. Address the fit before repeating a repair that keeps failing.
- 02
Prepare a manageable thread
Cut no more than about 24 inches of thread. Pass it through the needle and knot one end; leave the other end loose. Very long thread tangles more easily. A single strand also avoids adding unnecessary bulk to a fine seam.
- 03
Match the original seam line
Put the fabric’s right sides together. Working from inside the garment, align both seam allowances along the previous stitch line. Begin in sound stitching half an inch before the opening, with the knot against the fabric.
- 04
Sew back, then move forward
Bring the needle through both layers. Insert it about 1/16–1/8 inch behind that point, then bring it out the same distance ahead of the starting point. Repeat: enter at the end of the previous stitch and emerge one stitch ahead. Keep following the seam line through both layers.
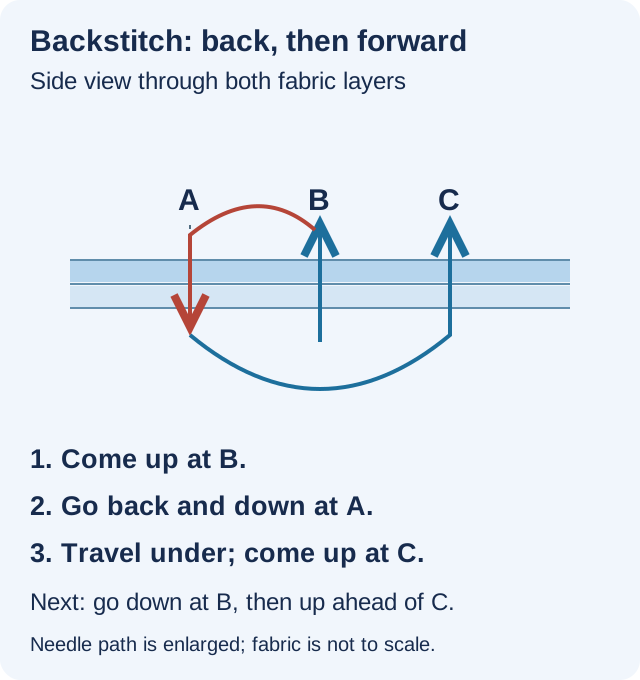
Keep the small surface stitches on the original seam line. The enlarged path shows where the needle goes.Open full-size image - 05
Overlap and secure the end
Continue at least half an inch into sound stitching beyond the gap. On the underside, begin a small stitch without pulling the needle through. Wrap the thread around the needle three times, then pull the needle through to form a knot against the fabric. Check the knot before trimming.
- 06
Check the finished repair
Remove pins and turn the garment right side out. Check for gaps or caught folds. Apply gentle tension to check the repair. Correct any uneven stitches before wearing the garment.
Optional supplies on Amazon
Affiliate disclosure: As an Amazon Associate I earn from qualifying purchases. How our links work.
Use what you already have. These links open Amazon search results so you can compare suitable supplies; they are not individual product reviews.
Needle and thread
Choose a sharp hand-sewing needle fine enough for the fabric, with an eye that takes your thread easily. Fine polyester sewing thread suits many woven garments; match the original color for a discreet repair.
Thread that keeps tangling
Shorten the next length to 24 inches or less. When a length runs out, finish it securely and begin another instead of struggling with an extra-long strand.
A bulky or obvious repair
For a discreet seam, use thread similar to the original. If an exact color is unavailable, a slightly darker match is often less noticeable.
Stopping exactly at the gap
Overlap the intact stitching at each end. Joining only the visibly open portion leaves the transition poorly supported.
A quick final check
- Sound fabric edges meet along the old line.
- Stitches cross both layers.
- Both ends overlap intact stitching and are secured.
Common questions & sticking points
What if the thread knots underneath?
Stop and work the tangle loose with the needle. If it will not release, cut out the knot and restart, overlapping the previous stitches by at least half an inch.
Can I use a large needle to make threading easier?
A larger needle makes a larger hole. Choose the narrowest needle whose eye comfortably takes the thread, rather than enlarging the needle solely for convenience.
Should the stitches show on the outside?
For this seam repair, check the outside as you finish: the seam should close cleanly. The repaired seam’s stitching lies inside the garment along the original joining line.
Sources & further reading Optional
References used to check this guide. Follow your product’s own safety instructions where its design differs.
- University of Tennessee 4-H: Repair Your Clothes, Activity 10
- Patagonia Care & Repair on iFixit: Backstitch on a Loose Hem
- iFixit / Patagonia Care & Repair: Needles and Thread
- Sewing & Craft Alliance / Singer: hand-stitching techniques