A missing shirt button is a useful first sewing repair. Work on a flat surface with good light and take the garment off before you begin. For your first attempt, a spare button on scrap fabric is easier to handle than a favorite shirt you need immediately.
Align a matching flat button, stitch repeatedly through its holes and the fabric, leave a little clearance underneath, then secure the thread and test the buttonhole.
Go straight to the stepsBefore you begin
These steps cover ordinary flat buttons on light or medium-weight garments. Riveted jeans buttons, snaps, and buttons with a built-in rear shank need different methods. Keep needles and loose buttons away from children.
What you’ll need
- A suitable flat two-hole or four-hole button
- Hand-sewing needle and thread
- Scissors and an optional spacer such as a toothpick
- Scrap fabric for practice
Tools & supplies for this project
Affiliate disclosure: We may earn a commission when you buy through these Lowe’s links. How our links work.
Use what you already own. If you need supplies, compare these options with the requirements above and choose only the items your project needs.
Check Lowe’s for current price, availability and specifications.
Let’s do this
Step by step
- 01
Check the replacement and its position
Test whether the button passes through the buttonhole. Use the old stitch marks and neighboring buttons to locate it. Line up the garment edges before marking the spot; do not rely only on eyeing a straight row.
- 02
Prepare the thread
Cut a manageable length, around 24 inches, thread the needle, double it, and knot the ends. Bring the needle from the back of the fabric to the marked point.
- 03
Secure the button through its holes
Lay a toothpick across the button beneath the stitches as a temporary spacer. Pass up through one hole and down through the next, catching the fabric below. Repeat several times without clamping the button tightly to the cloth. For four holes, work the second pair too, matching the parallel or crossed pattern on neighboring buttons.
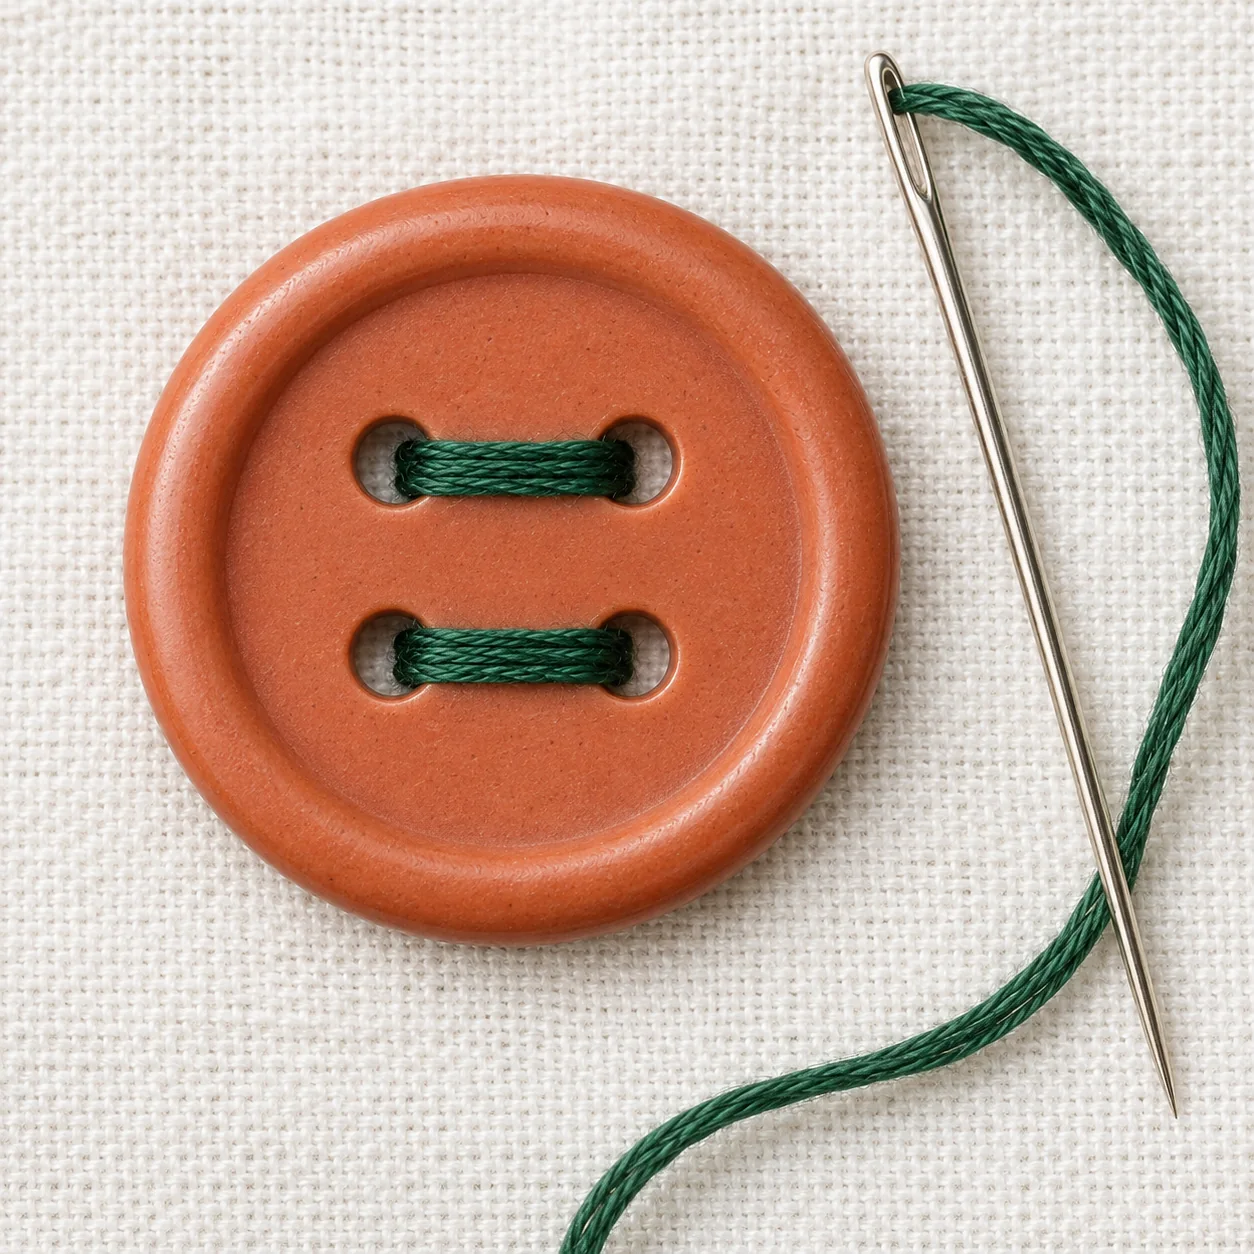
One finished stitch pattern: two parallel bars. Match the pattern on the garment’s other buttons.Open full-size image - 04
Leave space for the closure
Remove the toothpick after stitching. Bring the needle up through the fabric beneath the button, then wrap the working thread around the stitches between button and cloth. This small thread shank leaves room for the buttonhole fabric when you fasten the garment.
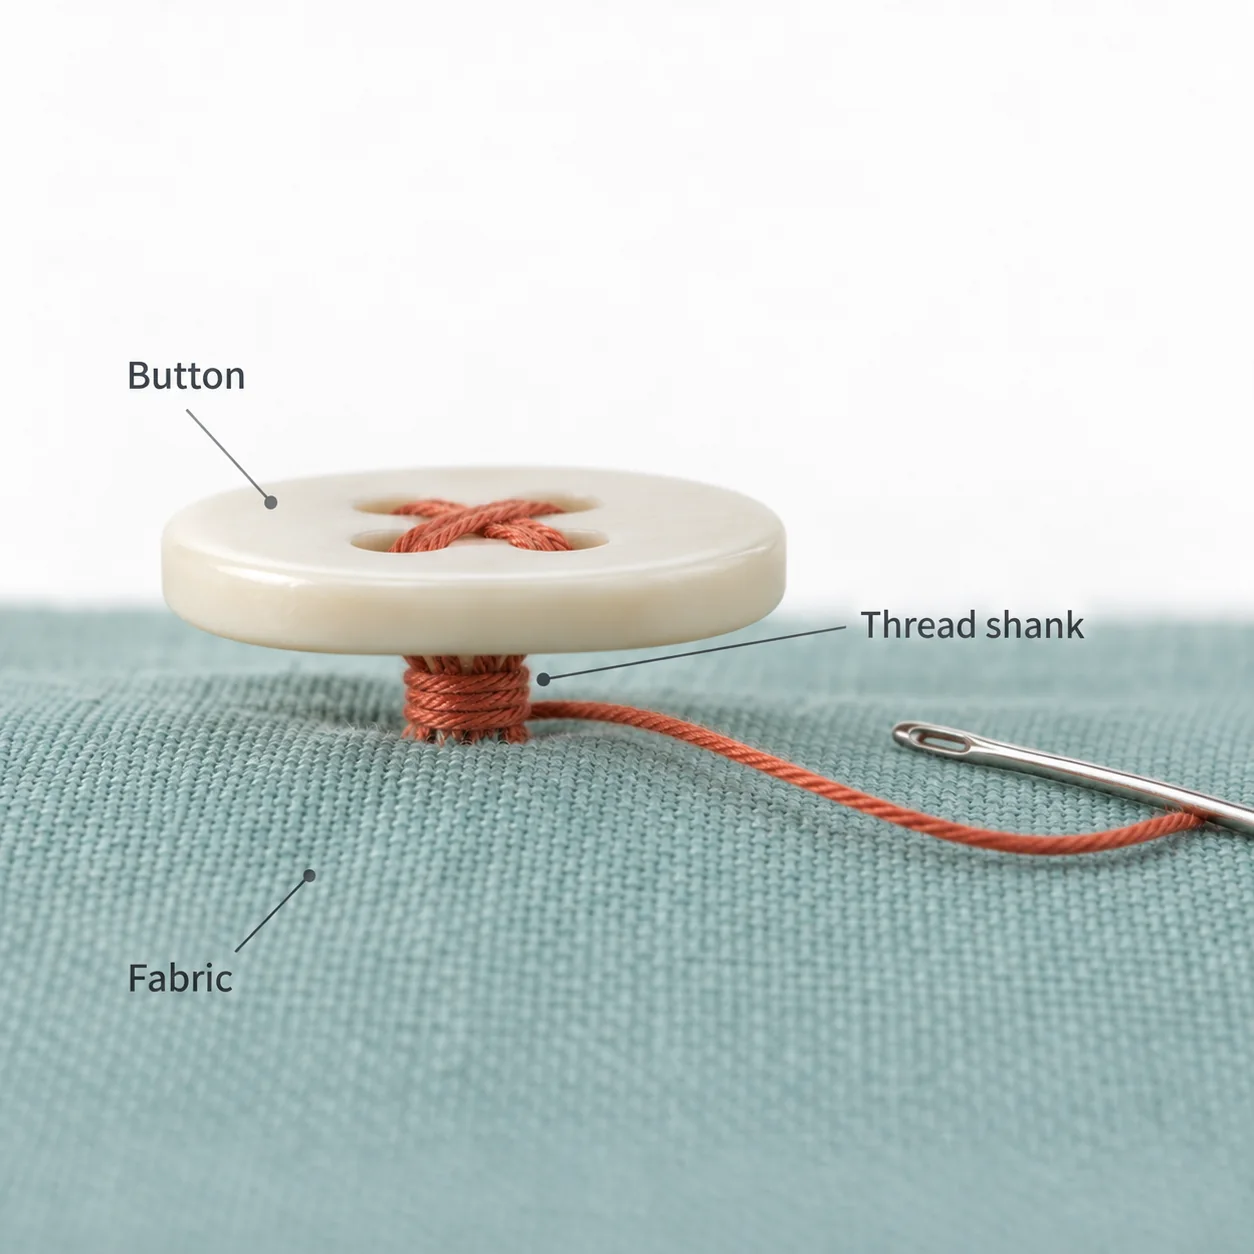
After removing the spacer, wrap the stitches beneath the button to leave room for the buttonhole fabric.Open full-size image - 05
Tie off and test
Take the needle to the back, make a small stitch through the back-side threads, pass through the resulting loop, and tighten. Repeat to secure, then trim. Button and unbutton the garment and check alignment.
Optional supplies on Amazon
Affiliate disclosure: As an Amazon Associate I earn from qualifying purchases. How our links work.
Use what you already have. These links open Amazon search results so you can compare suitable supplies; they are not individual product reviews.
Practice before repairing the shirt
On scrap fabric, draw a small dot for the intended position. Sew the button, then inspect both sides. If the back has large loose loops or the front pulls into a tight pucker, remove the practice stitches and try a shorter thread length and gentler tension.
A useful test is whether you can lift the button slightly without seeing loose stitches unravel. The closure also needs enough room for the fabric containing the buttonhole. “Secure” and “pressed completely flat” are different goals.
When the repair still looks wrong
If the garment pulls sideways when fastened, compare the button position with the buttonhole while the edges lie flat. More stitches will not fix a misplaced button. If the fabric around the original position is torn or weakened, that area needs attention before simply attaching the button again.
A quick final check
- The button fits the existing hole.
- The garment closes without sideways pulling.
- The thread is secured and the needle is put away.
Common questions & sticking points
Where can I find a matching spare button?
Check the care label, inside seams, or the small packet supplied with the garment. Match the diameter and thickness as well as the color.
Do I need a sewing machine?
No. This repair uses a hand needle and thread. Some machines can attach suitable buttons, but that is a separate method.
Sources & further reading Optional
References used to check this guide. Follow your product’s own safety instructions where its design differs.
- Patagonia: Button types, materials, and repair guidance
- University of Florida IFAS: Hand-sewing button instructions