A small nail hole needs a small repair. This method is for sound, dry drywall with nail holes or shallow dents—not a fist-sized opening, crumbling plaster, moving crack, or water-damaged wall.
Clean the area, press suitable spackle into the hole, smooth it, let it dry completely, then finish and paint according to the product labels.
Go straight to the stepsBefore you begin
Before disturbing paint in a pre-1978 home, treat it as potentially containing lead unless properly assessed. Use a lead-safe professional where appropriate. Ordinary sanding instructions and a basic dust mask are not a lead-safe work plan.
What you’ll need
- Suitable spackling compound
- Small putty knife
- Fine sanding sponge if needed
- Eye and dust protection appropriate to the product
- Compatible primer and matching paint
- Dust-catching sheet
Tools & supplies for this project
Affiliate disclosure: We may earn a commission when you buy through these Lowe’s links. How our links work.
Use what you already own. If you need supplies, compare these options with the requirements above and choose only the items your project needs.
Check Lowe’s for current price, availability and specifications.
Let’s do this
Step by step
- 01
Check the wall
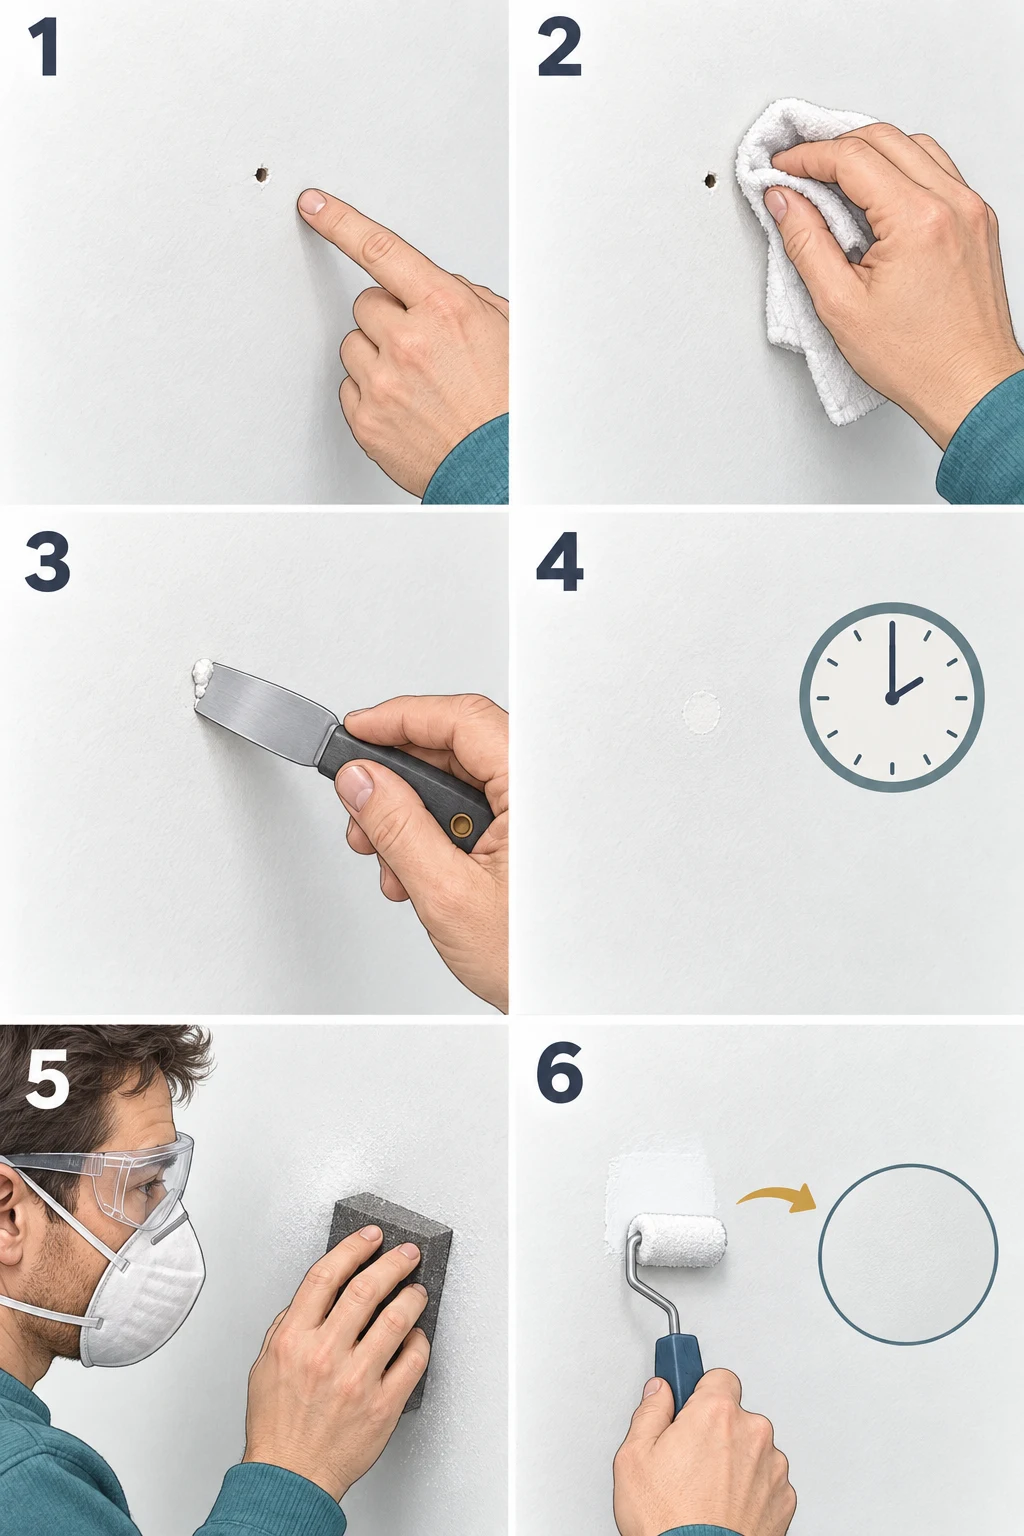
Look for moisture, softness, or a recurring crack. Fix the underlying cause first. Confirm the paint can be disturbed safely and protect the floor.
Open full-size image - 02
Clear loose material
Remove loose dust and flakes without enlarging the hole. Leave a firm, clean, dry surface. Do not dig into an unknown wall cavity.
Open full-size image - 03
Fill the opening
Use a small amount of spackle suitable for the repair. Press it into the hole with the knife, then draw the knife across to remove excess and feather the edges.
Open full-size image - 04
Wait for full drying
Follow the label’s depth and drying directions. A dry-looking skin may hide wet material underneath. Add another thin coat only if needed and let it dry again.
Open full-size image - 05
Smooth and clean
If the dry repair is proud of the wall, lightly smooth it with the recommended fine abrasive, using suitable dust control and protection. Remove dust before painting.
Open full-size image - 06
Prime and paint
Follow the filler and paint instructions for priming. Match the surrounding paint’s color and sheen, then check the dry finish in side light before deciding whether another coat is needed.
Open full-size image
Optional supplies on Amazon
Affiliate disclosure: As an Amazon Associate I earn from qualifying purchases. How our links work.
Use what you already have. These links open Amazon search results so you can compare suitable supplies; they are not individual product reviews.
Why a patch shows through
A repair can stand out because of a ridge, a hollow, different texture, or a mismatched sheen. Identify which one you see before adding more material. Painting a raised lump repeatedly will not make the wall flat.
Keep the repair small
Make a practice pass with the clean knife before loading it. A broad mound creates more finishing work than a neatly filled nail hole. If the opening has no backing or exceeds the filler’s stated use, choose a proper patch system instead.
A quick final check
- Lead and moisture concerns were resolved first.
- The patch is dry and level.
- The finish matches after drying.
Common questions & sticking points
Can I use toothpaste?
Use a wall-repair product intended to accept paint. Household substitutes do not give a predictable repair.
How long before I can paint?
Use the product’s drying instructions for your repair depth and room conditions. There is no reliable universal 15-minute rule.
Sources & further reading Optional
References used to check this guide. Follow your product’s own safety instructions where its design differs.
- DAP: Spackling preparation and finishing
- EPA: Lead-safe renovations for homeowners
- EPA: Correct underlying moisture and material problems