Choose an ordinary mug, small box, or piece of fruit for your first drawing. One object gives you enough to practice without filling the page with detail. The exercise below is a suggested starting routine: observe, sketch lightly, compare, and make one useful adjustment.
Draw one simple object using light shapes first. Compare its height and width, refine the outline, then add a few light and dark areas.
Go straight to the stepsBefore you begin
A cover picture is not a drawing template. Work from the object in front of you. Start with materials you already have; specialized pencils and paid software are optional.
What you’ll need
- Plain paper or a sketchbook
- A graphite pencil, such as HB
- An eraser
- One simple object and steady light
Let’s do this
Step by step
- 01
Set up one clear view
Put the object on a table where it will not move. Choose a position you can keep while drawing. Leave space around the object on the page so the outline does not run into an edge.
- 02
Warm up with loose shapes
Draw several lines, circles, and ovals lightly. Try a few pencil angles and pressures on a spare corner. Notice the difference between a light guide line and a dark mark that is harder to adjust.
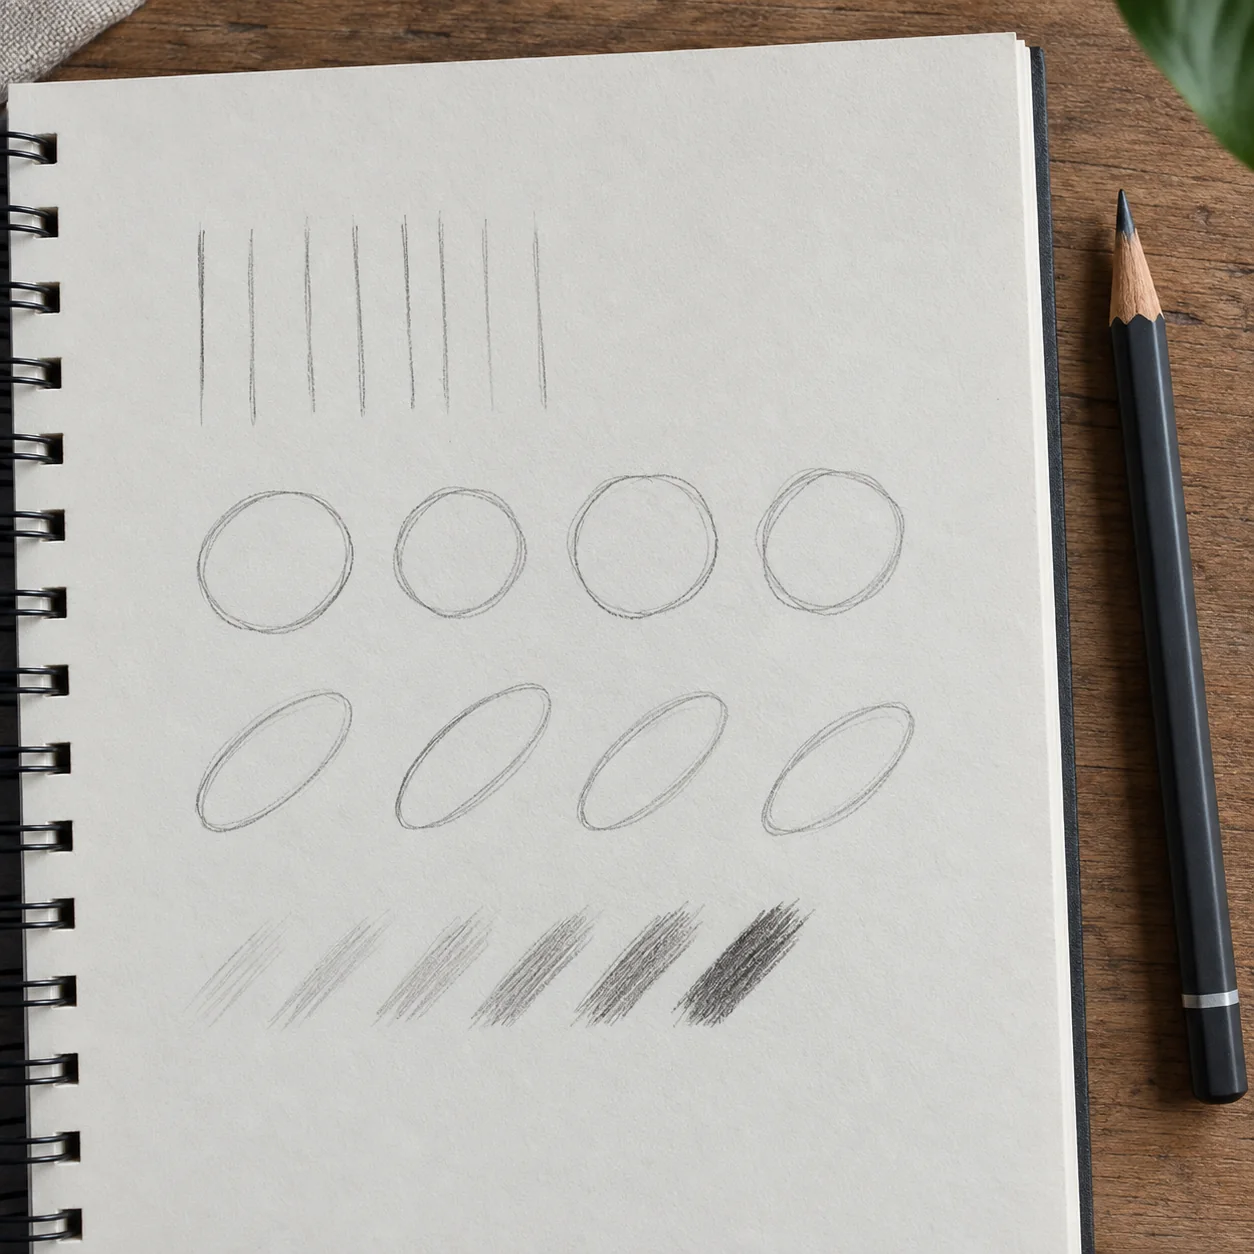
Use loose, light marks to warm up. Try pressure on a spare area before darkening your main drawing.Open full-size image - 03
Block in the biggest shape
Before drawing a handle or a label, mark the object’s overall height and width. Use a simple box or oval shape as a guide. Compare the sketch with the object: is it taller, wider, or more tilted?
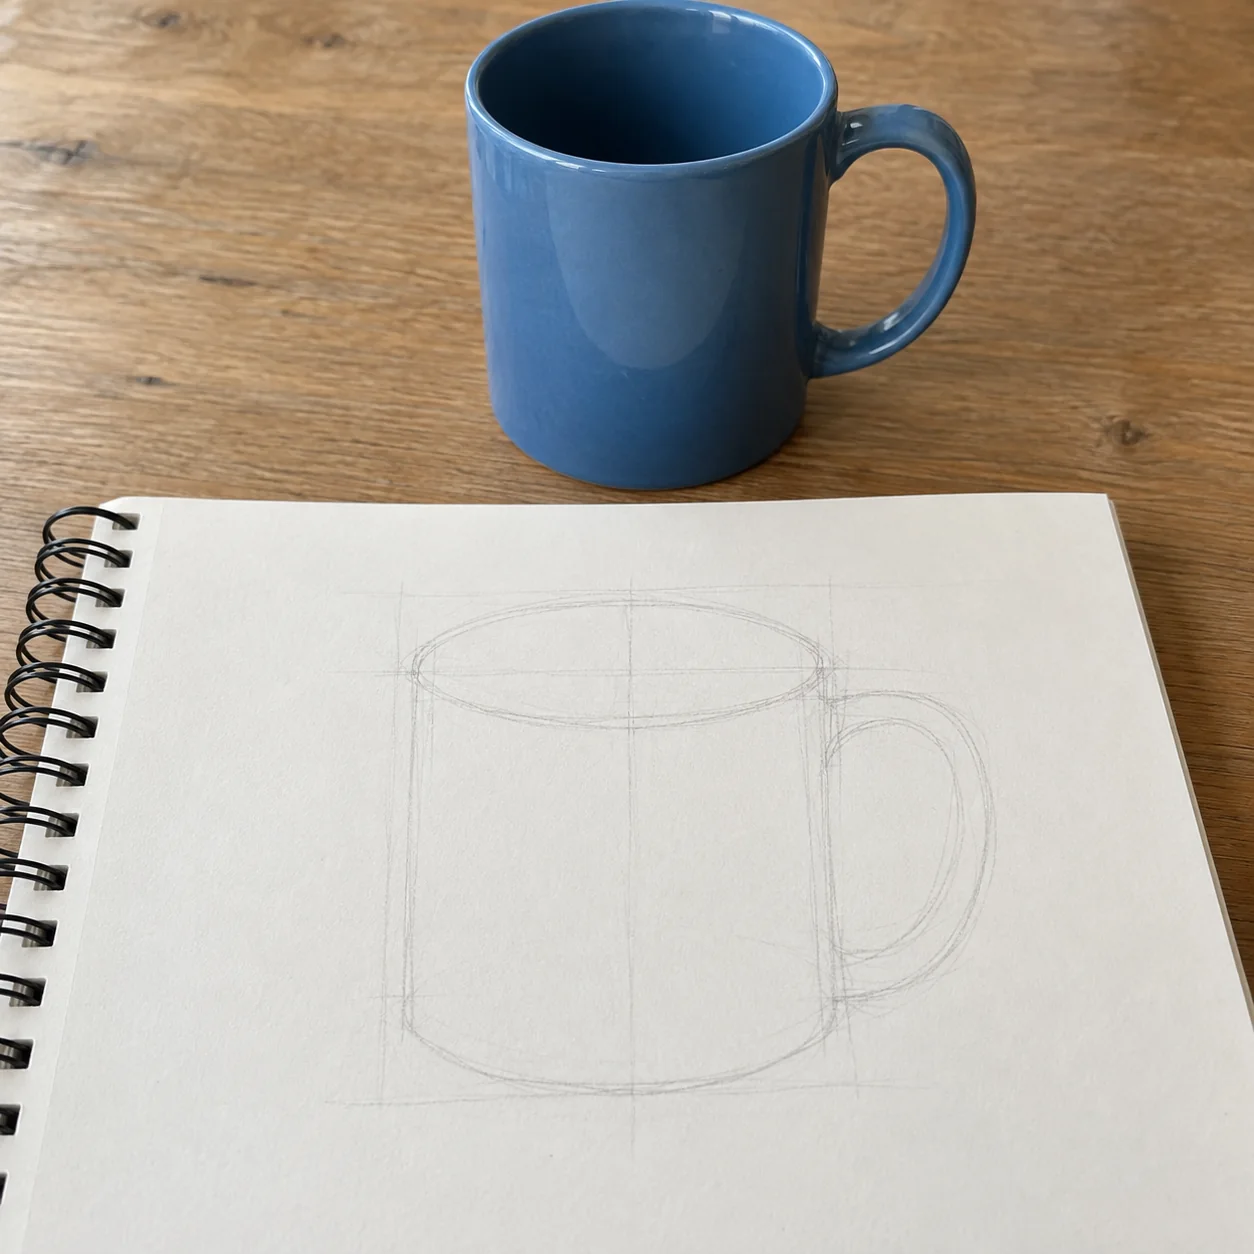
Start lightly with the overall height, width and opening. Compare these simple shapes with the object before adding details.Open full-size image - 04
Refine one part at a time
Adjust the outline before adding small details. For a mug, compare the top opening with the bottom and then place the handle. Look back at the real object frequently instead of drawing only what you expect a mug to look like.
- 05
Add a small range of tones
Leave the brightest area mostly paper-colored. Use light strokes for a middle tone and denser marks for the darkest area. Hatching builds tone with lines; crossing those lines can make an area darker.
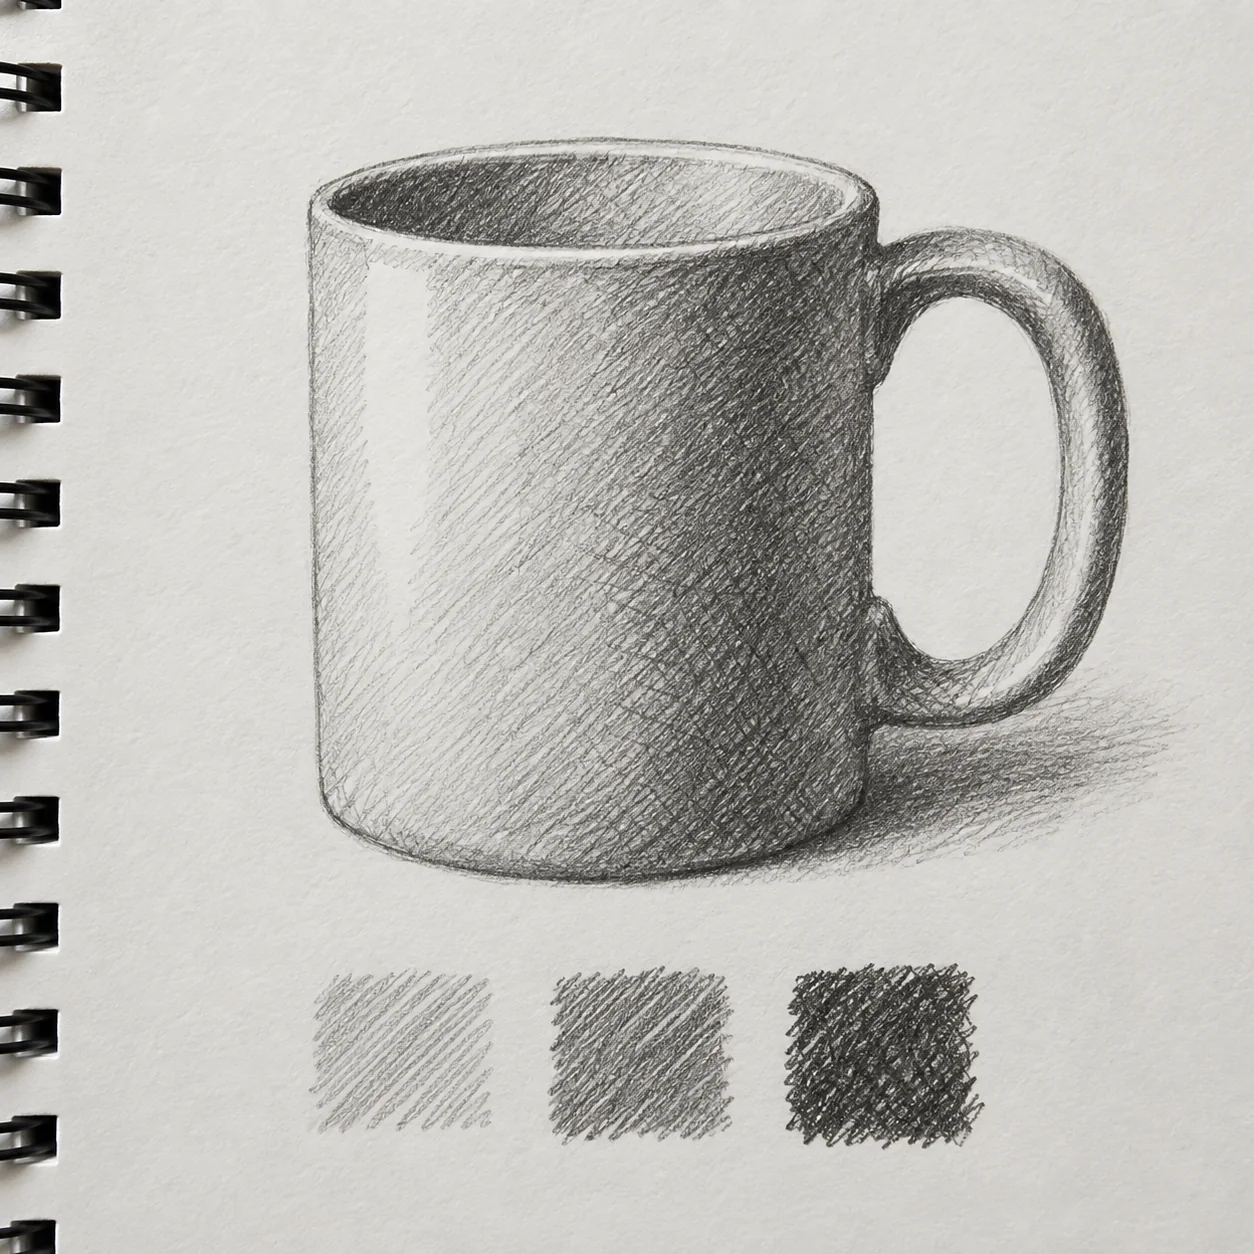
Leave highlights mostly paper-colored. Build middle and dark tones gradually with closer or crossing strokes.Open full-size image
Optional supplies on Amazon
Affiliate disclosure: As an Amazon Associate I earn from qualifying purchases. How our links work.
Use what you already have. These links open Amazon search results so you can compare suitable supplies; they are not individual product reviews.
Try a three-pass practice page
Use five minutes for only the outer shape, five for proportion changes, and five for light and dark areas. Spend the remaining time writing one observation beneath the sketch. These timings are an optional exercise, not a speed test.
Draw the same object again on another day from a similar viewpoint. Keep the first page. Comparing two actual attempts makes a change in proportion or line control easier to notice than comparing your work with an expert’s finished illustration.
A better question than “Is it good?”
Ask whether the object fits on the page, whether its height-to-width relationship looks close, and whether the darkest area is where you observe the deepest shadow. Choose one answer to work on next.
If the paper becomes gray everywhere, stop adding marks and look for the lightest parts. If the outline is right but the object feels flat, compare the large light and dark shapes before drawing extra surface detail.
A quick final check
- I began with the overall shape.
- I compared proportions with the real object.
- I identified one specific thing to practice next.
Common questions & sticking points
Do I need an expensive pencil set?
No. A basic pencil and paper are enough for this first exercise. Different graphite grades become useful when you know what line or tone you want.
Is tracing the same as drawing from observation?
They are different exercises. Tracing can explore an existing contour, while this exercise asks you to decide where that contour belongs on a blank page.
Sources & further reading Optional
References used to check this guide. Follow your product’s own safety instructions where its design differs.
Last source check: September 21, 2026