Not necessarily. Thai Kitchen directs you to bring water to a boil, remove the pot from the heat, then soak its thin rice noodles for three to five minutes until soft but still firm. Drain and combine with the dish promptly. Check the specific package, since wider or differently prepared noodles may use another method; continuous boiling can oversoften a thin product.
Thai Kitchen suggests a gentle warm-water rinse for its softened thin rice noodles. Loosen them carefully rather than pulling dry clumps apart with force. Drain well afterward so you do not dilute the sauce. Prepare the other ingredients before softening the noodles when possible; a quick move from draining to the finished dish reduces the time available for them to stick.
Let the soaking liquid settle and pour off the flavorful upper portion carefully, leaving the sediment behind. South Mill's recipe specifically warns against swirling the container before pouring because grit can collect at the bottom. Use the clean portion in the recipe's cooking liquid. Do not empty the final cloudy splash into the pan just to avoid leaving a spoonful behind.
Optional supplies on Amazon
Affiliate disclosure: As an Amazon Associate I earn from qualifying purchases. How our links work.
Reserve a clean portion before adding raw meat if you want an easy sauce. Marinade that has already touched raw meat or poultry must come to a boil before it is reused. Simply warming it or stirring it into a finished dish is insufficient. Keep the reserved portion separate, with its own clean utensil, so it stays uncontaminated.
Do not partially cook chicken, refrigerate it, and finish it later. The first heating may leave harmful bacteria alive. Plan to cook it completely in one session instead. Partial cooking in a microwave or another method is acceptable only when the chicken moves immediately to a hot grill to finish cooking, without a storage break between the two stages.
USDA permits cooking frozen beef in an oven, on the stove, or on a grill. Expect it to take roughly half again as long as thawed beef, and check doneness with a food thermometer rather than the clock. This does not extend to a slow cooker: thaw the beef first for that method. Follow the appropriate temperature for the cut.
Optional supplies on Amazon
Affiliate disclosure: As an Amazon Associate I earn from qualifying purchases. How our links work.
The red liquid is mainly moisture released from the meat, rather than a pool of blood. Most blood is removed during slaughter; beef contains substantial water, which mixes with proteins from the muscle. Treat the package liquid as raw meat juice when handling it. Its presence alone does not tell you whether the beef has been stored safely.
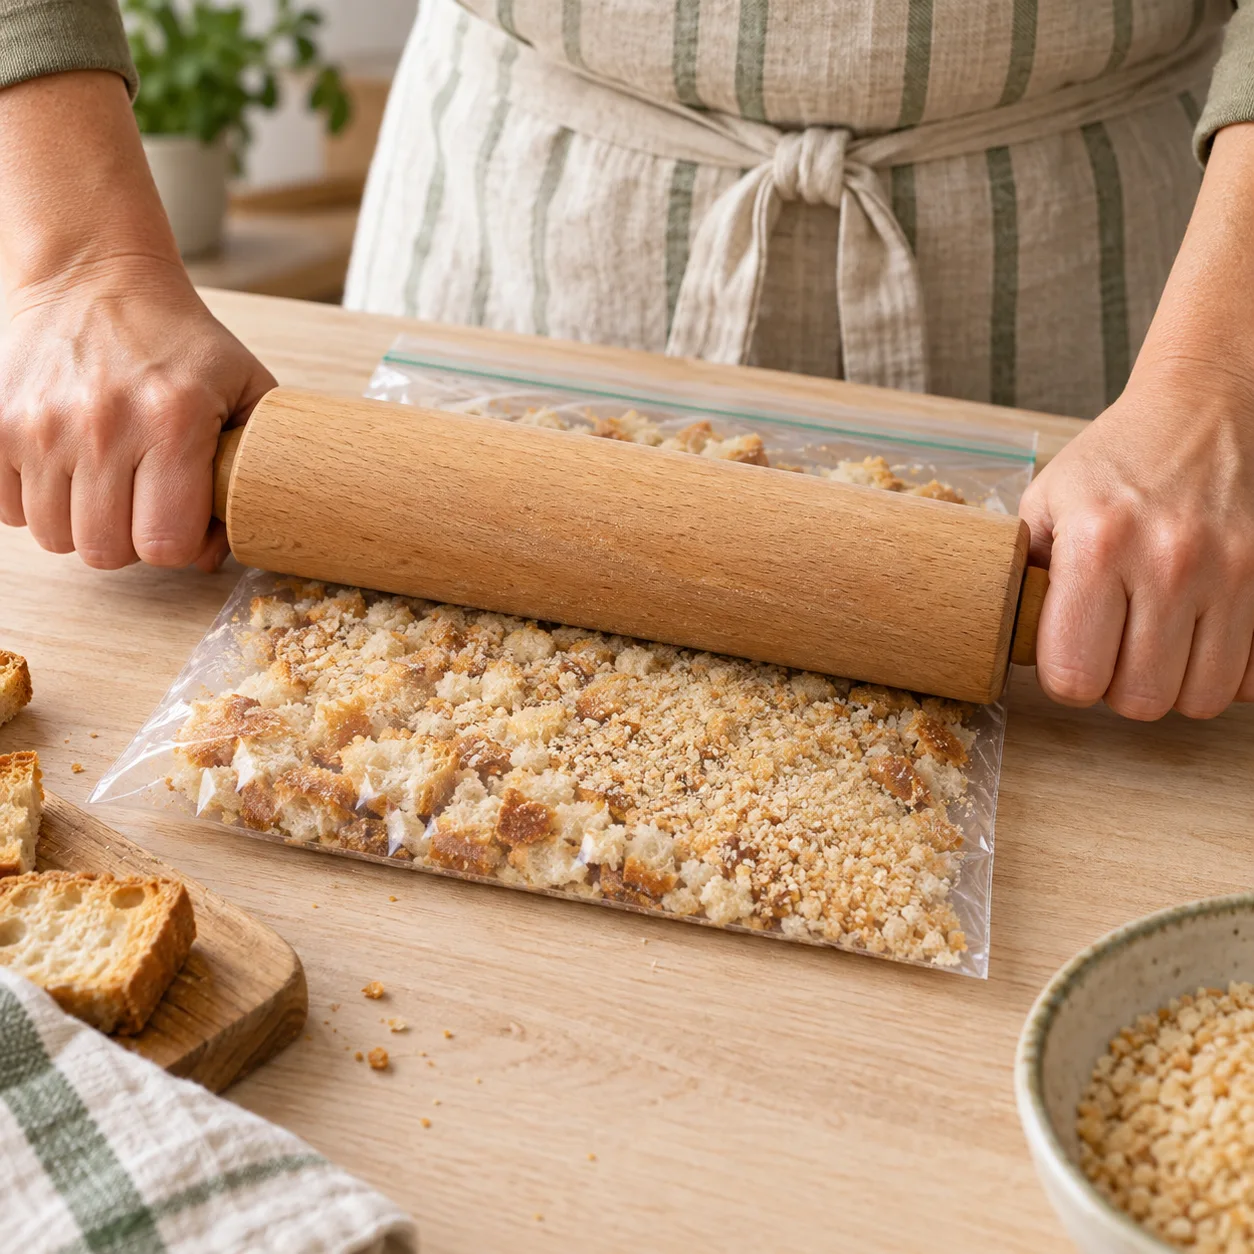
Cut or tear bread into small pieces, toast them until dry and lightly golden, and let them cool completely. Put the cooled pieces in a sturdy food bag and crush them with a rolling pin. Stop when the texture suits the dish: a fine coating needs more crushing than a rustic topping. Check for large hard pieces before using them.
Cool toasted bread first, then crush it inside a sturdy bag to the texture you need. Open full-size image ↗
Optional supplies on Amazon
Affiliate disclosure: As an Amazon Associate I earn from qualifying purchases. How our links work.
Protect the head in a packet rather than leaving the exposed cloves uncovered. Cut across the top to reveal the cloves, drizzle with olive oil, and enclose it in foil or secured parchment. Roast until the cloves soften and color; the recipe uses 400°F and checks within a broad forty to seventy minute window because heads vary in size.
Allow the roasted head to cool enough to handle, then squeeze the soft cloves from their skins. Properly roasted garlic should be creamy enough to mash into butter, potatoes, dips, or sauces. If the cloves are still firm, more roasting is needed before squeezing. Exposing the cloves by cutting the top from the head before roasting makes this step easier.
Try a shorter roast and judge the strands, not just the softness of the shell. Love and Lemons roasts cut halves at 400°F for about thirty to forty minutes, stopping while the flesh retains some firmness. A very long roast can make the strands collapse. Squash size and oven behavior vary, so start checking before committing to a full hour.
Prick the skin all over with a fork, then soften the whole squash briefly before attempting to halve it. Love and Lemons suggests ten minutes in a 400°F oven or short microwave bursts. Let it become manageable to handle, stabilize it on the board, and cut carefully. This preliminary heating only eases cutting; continue with the full roasting method afterward.
The seeds need another stir after their initial soak. Mix the pudding thoroughly, refrigerate it, then stir again after an hour or two to break up clusters at the bottom and throughout the jar. Separated seeds can absorb liquid more evenly. Cover and continue chilling until the mixture has a pudding texture, rather than expecting the first shake to do everything.
Optional supplies on Amazon
Affiliate disclosure: As an Amazon Associate I earn from qualifying purchases. How our links work.
First stir thoroughly and check whether seeds have gathered in clumps instead of absorbing the liquid evenly. If it remains thin after its overnight chill, add a little more chia, mix well, and refrigerate for several additional hours. The new seeds need time to hydrate. Adding a large handful immediately before serving can leave a gritty mixture instead of smooth pudding.
Optional supplies on Amazon
Affiliate disclosure: As an Amazon Associate I earn from qualifying purchases. How our links work.
Keep the ingredients cold and mix briefly, leaving small lumps. A long, vigorous whisking develops a heavier coating instead of the delicate texture you want. Have the prepared vegetables and frying setup ready before mixing so the batter can be used promptly. Lightly combining cold flour, egg, and iced water works better than making a smooth batter well ahead of cooking.
Dry the prepared vegetables before coating them. A light dusting of flour helps the wet batter adhere to their surfaces. Choose vegetables that suit the method; very watery pieces are harder to coat successfully. Dip shortly before frying and work in small batches. The aim is a thin attached shell, so a heavy flour layer is not the solution.
Keep the back side relatively flat and pleat the front edge against it. Place filling in the center, lightly moisten the rim, and fold the wrapper into a half moon. Make each small fold on the front, then press it firmly to the back edge. Finish by checking the entire seam so decorative pleats do not hide an unsealed opening.
Set completed dumplings on a parchment lined tray and cover them while working through the remaining wrappers. Keep their flat bases down and leave space so the wrappers do not stick together. Organizing a small filling station helps you finish each dumpling promptly. The covering protects the delicate dough while you work; it is not a reason to leave filling out indefinitely.
Keep the starch if your recipe uses it as a binder. Squeeze the grated potatoes and onion over a bowl, let the liquid stand briefly, then carefully pour away the watery portion. The pale starch remains at the bottom. Mix it back into the potato mixture with the other ingredients, scraping the bowl so the settled layer is included.
For the method described by KQED, grate only what you can fry in a few batches. Grated potatoes release liquid and darken as they wait, which makes a large advance batch troublesome. Work through grating, squeezing, mixing, and frying in manageable rounds. Alternating onion with potato during grating can help limit discoloration, but it does not eliminate the need to work promptly.
Slice off the top and bottom to create a stable base, then cut away the peel and white pith following the fruit’s curve. With a small sharp knife, cut beside each membrane to release the flesh between them. Work carefully over a bowl to catch the juice. These clean segments are useful in salads where tough membrane would be distracting.
Use freshly cooked Japanese short grain rice and shape it while pleasantly warm. Long grain varieties do not give the same cohesion. Moisten clean hands to reduce sticking, then press firmly enough to hold the rice together without crushing it. Rotate the ball as you apply gentle pressure. A rice mold can help with shape, but it cannot correct unsuitable rice.
Add the nori immediately before eating if you want a crisp wrapper. Moisture from the rice softens seaweed quickly, so an already wrapped rice ball will have a different texture. Keep the nori separately sealed until you need it. Soft nori is also a normal serving preference; the timing depends on the texture you want, rather than one required wrapping method.
Adding miso near serving time protects its delicate aroma. Cook the other ingredients in the broth as needed, then turn off the heat and dissolve the paste. A vigorous boil after that can flatten its fragrance and flavor. Taste before adding more because miso varieties differ in saltiness. This is a flavor technique, rather than a claim about preserving particular health benefits.